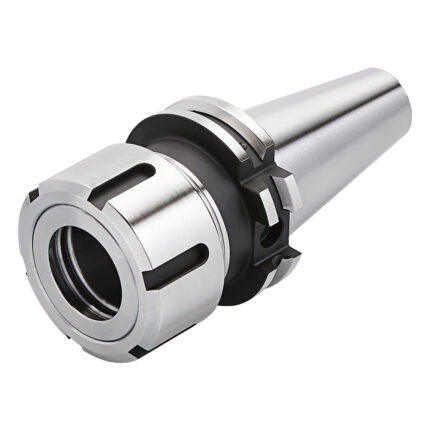
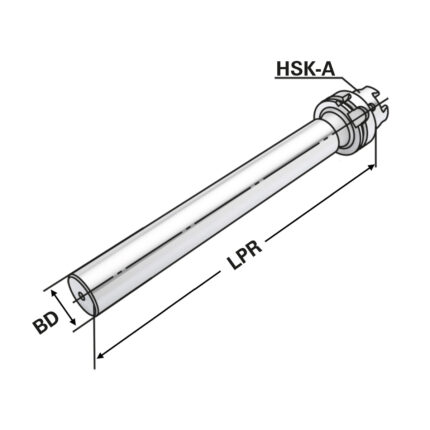
ISO 12164-1 (HSK-A)
Tapping chucks for synchronisation HSK 100 – M3-M27 – 110 | ER 32
Application:
For machining centres with synchronous spindle.
Note:
- Synchro tapping chucks compensate synchronisation errors.
- Minimal length compensation on compression and expansion balances very small pitch differences between synchro spindle and tap, which can cause high frictional forces on the thread flanks.
- A possible increase of axial force during the tapping process is reduced to a minimum.
- Suitable for internal coolant.
- Coolant pressure up to max. 100 bar.
Delivery:
With balanced clamping nut
- All holders are made of forged steel
- Specific, low warpage hardened
- Surface hardened HRC 58~60
- Hardening depth 0,8mm~0,9mm
- Taper angle tolerance < AT 3 according to DIN 2080
- Surface roughness Ra < 0,4 µm
- Tensile strength in the core of min. 800 N/mm? after DIN
- All functional surfaces fine machined
Tapping chucks for synchronisation HSK 100 – M3-M33 – 136 | ER 40
Application:
For machining centres with synchronous spindle.
Note:
- Synchro tapping chucks compensate synchronisation errors.
- Minimal length compensation on compression and expansion balances very small pitch differences between synchro spindle and tap, which can cause high frictional forces on the thread flanks.
- A possible increase of axial force during the tapping process is reduced to a minimum.
- Suitable for internal coolant.
- Coolant pressure up to max. 100 bar.
Delivery:
With balanced clamping nut
- All holders are made of forged steel
- Specific, low warpage hardened
- Surface hardened HRC 58~60
- Hardening depth 0,8mm~0,9mm
- Taper angle tolerance < AT 3 according to DIN 2080
- Surface roughness Ra < 0,4 µm
- Tensile strength in the core of min. 800 N/mm? after DIN
- All functional surfaces fine machined
Tapping chucks for synchronisation HSK 63 – M3-M12 – 100 | ER 16 | Mini
Application:
For machining centres with synchronous spindle.
Note:
- Synchro tapping chucks compensate synchronisation errors.
- Minimal length compensation on compression and expansion balances very small pitch differences between synchro spindle and tap, which can cause high frictional forces on the thread flanks.
- A possible increase of axial force during the tapping process is reduced to a minimum.
- Suitable for internal coolant.
- Coolant pressure up to max. 100 bar.
Delivery:
With balanced clamping nut
- All holders are made of forged steel
- Specific, low warpage hardened
- Surface hardened HRC 58~60
- Hardening depth 0,8mm~0,9mm
- Taper angle tolerance < AT 3 according to DIN 2080
- Surface roughness Ra < 0,4 µm
- Tensile strength in the core of min. 800 N/mm? after DIN
- All functional surfaces fine machined
Tapping chucks for synchronisation HSK 63 – M3-M12 – 93 | ER 16
Application:
For machining centres with synchronous spindle.
Note:
- Synchro tapping chucks compensate synchronisation errors.
- Minimal length compensation on compression and expansion balances very small pitch differences between synchro spindle and tap, which can cause high frictional forces on the thread flanks.
- A possible increase of axial force during the tapping process is reduced to a minimum.
- Suitable for internal coolant.
- Coolant pressure up to max. 100 bar.
- All holders are made of forged steel
- Specific, low warpage hardened
- Surface hardened HRC 58~60
- Hardening depth 0,8mm~0,9mm
- Taper angle tolerance < AT 3 according to DIN 2080
- Surface roughness Ra < 0,4 µm
- Tensile strength in the core of min. 800 N/mm? after DIN
- All functional surfaces fine machined
Tapping chucks for synchronisation HSK 63 – M3-M12 – 93 | ER 16 | Mini
Application:
For machining centres with synchronous spindle.
Note:
- Synchro tapping chucks compensate synchronisation errors.
- Minimal length compensation on compression and expansion balances very small pitch differences between synchro spindle and tap, which can cause high frictional forces on the thread flanks.
- A possible increase of axial force during the tapping process is reduced to a minimum.
- Suitable for internal coolant.
- Coolant pressure up to max. 100 bar.
Delivery:
With balanced clamping nut
- All holders are made of forged steel
- Specific, low warpage hardened
- Surface hardened HRC 58~60
- Hardening depth 0,8mm~0,9mm
- Taper angle tolerance < AT 3 according to DIN 2080
- Surface roughness Ra < 0,4 µm
- Tensile strength in the core of min. 800 N/mm? after DIN
- All functional surfaces fine machined
Tapping chucks for synchronisation HSK 63 – M3-M16 – 94 | ER 20
Application:
For machining centres with synchronous spindle.
Note:
- Synchro tapping chucks compensate synchronisation errors.
- Minimal length compensation on compression and expansion balances very small pitch differences between synchro spindle and tap, which can cause high frictional forces on the thread flanks.
- A possible increase of axial force during the tapping process is reduced to a minimum.
- Suitable for internal coolant.
- Coolant pressure up to max. 100 bar.
Delivery:
With balanced clamping nut
- All holders are made of forged steel
- Specific, low warpage hardened
- Surface hardened HRC 58~60
- Hardening depth 0,8mm~0,9mm
- Taper angle tolerance < AT 3 according to DIN 2080
- Surface roughness Ra < 0,4 µm
- Tensile strength in the core of min. 800 N/mm? after DIN
- All functional surfaces fine machined
Tapping chucks for synchronisation HSK 63 – M3-M20 – 98 | ER 25
Application:
For machining centres with synchronous spindle.
Note:
- Synchro tapping chucks compensate synchronisation errors.
- Minimal length compensation on compression and expansion balances very small pitch differences between synchro spindle and tap, which can cause high frictional forces on the thread flanks.
- A possible increase of axial force during the tapping process is reduced to a minimum.
- Suitable for internal coolant.
- Coolant pressure up to max. 100 bar.
Delivery:
With balanced clamping nut
- All holders are made of forged steel
- Specific, low warpage hardened
- Surface hardened HRC 58~60
- Hardening depth 0,8mm~0,9mm
- Taper angle tolerance < AT 3 according to DIN 2080
- Surface roughness Ra < 0,4 µm
- Tensile strength in the core of min. 800 N/mm? after DIN
- All functional surfaces fine machined
Tapping chucks for synchronisation HSK 63 – M3-M27 – 108 | ER 32
Application:
For machining centres with synchronous spindle.
Note:
- Synchro tapping chucks compensate synchronisation errors.
- Minimal length compensation on compression and expansion balances very small pitch differences between synchro spindle and tap, which can cause high frictional forces on the thread flanks.
- A possible increase of axial force during the tapping process is reduced to a minimum.
- Suitable for internal coolant.
- Coolant pressure up to max. 100 bar.
Delivery:
With balanced clamping nut
- All holders are made of forged steel
- Specific, low warpage hardened
- Surface hardened HRC 58~60
- Hardening depth 0,8mm~0,9mm
- Taper angle tolerance < AT 3 according to DIN 2080
- Surface roughness Ra < 0,4 µm
- Tensile strength in the core of min. 800 N/mm? after DIN
- All functional surfaces fine machined
Tapping chucks for synchronisation HSK 63 – M3-M33 – 133,5 | ER 40
Application:
For machining centres with synchronous spindle.
Note:
- Synchro tapping chucks compensate synchronisation errors.
- Minimal length compensation on compression and expansion balances very small pitch differences between synchro spindle and tap, which can cause high frictional forces on the thread flanks.
- A possible increase of axial force during the tapping process is reduced to a minimum.
- Suitable for internal coolant.
- Coolant pressure up to max. 100 bar.
Delivery:
With balanced clamping nut
- All holders are made of forged steel
- Specific, low warpage hardened
- Surface hardened HRC 58~60
- Hardening depth 0,8mm~0,9mm
- Taper angle tolerance < AT 3 according to DIN 2080
- Surface roughness Ra < 0,4 µm
- Tensile strength in the core of min. 800 N/mm? after DIN
- All functional surfaces fine machined
Test arbor HSK 100 – 50 – 329
Application:
For the inspection of machine tools according to ISO recommendation R230 or for testing the tool spindle.
Delivery with test certificate
- All holders are made of forged steel
- Specific, low warpage hardened
- Surface hardened HRC 58~60
- Hardening depth 0,8mm~0,9mm
- Surface roughness Ra < 0,4 µm
- Tensile strength in the core of min. 800 N/mm? after DIN
- All functional surfaces fine machined
Test arbor HSK 32 – 25 – 200
Application:
For the inspection of machine tools according to ISO recommendation R230 or for testing the tool spindle.
Delivery:
with test certificate
- All holders are made of forged steel
- Specific, low warpage hardened
- Surface hardened HRC 58~60
- Hardening depth 0,8mm~0,9mm
- Surface roughness Ra < 0,4 µm
- Tensile strength in the core of min. 800 N/mm? after DIN
- All functional surfaces fine machined
Test arbor HSK 40 – 25 – 200
Application:
For the inspection of machine tools according to ISO recommendation R230 or for testing the tool spindle.
Delivery:
with test certificate
- All holders are made of forged steel
- Specific, low warpage hardened
- Surface hardened HRC 58~60
- Hardening depth 0,8mm~0,9mm
- Surface roughness Ra < 0,4 µm
- Tensile strength in the core of min. 800 N/mm? after DIN
- All functional surfaces fine machined


