Taper Face ~ISO 7388-1
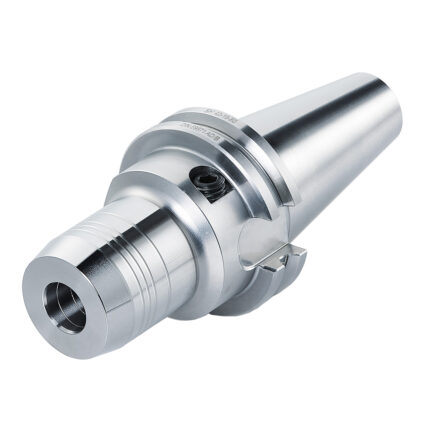
Hydraulic expansion chuck SK 40 – 06 – 68
Application:
For mounting straight-shank tools acc. DIN 1835 form A+B+E and DIN 6535 form HA+HB+HE (larger than dia. 20 mm only with reduction sleeve).
Note:
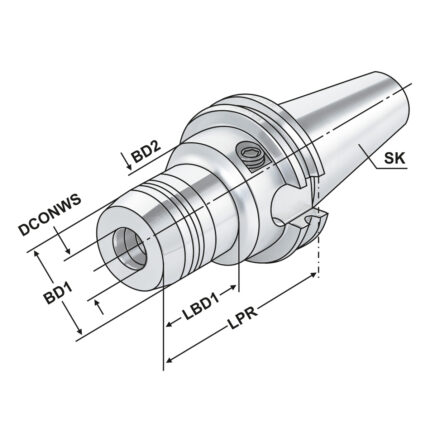
l1 = max. clamping depth l2 = max. length adjustment range
Without wrench
- All holders are made of forged steel
- Specific, low warpage hardened
- Surface hardened HRC 58~60
- Hardening depth 0,8mm~0,9mm
- Taper angle tolerance < AT 3 according to DIN 2080
- Surface roughness Ra < 0,4 µm
- Tensile strength in the core of min. 800 N/mm? after DIN
- All functional surfaces fine machined
Hydraulic expansion chuck SK 40 – 08 – 68
Application:
For mounting straight-shank tools acc. DIN 1835 form A+B+E and DIN 6535 form HA+HB+HE (larger than dia. 20 mm only with reduction sleeve).
Note:
l1 = max. clamping depth l2 = max. length adjustment range
Without wrench
- All holders are made of forged steel
- Specific, low warpage hardened
- Surface hardened HRC 58~60
- Hardening depth 0,8mm~0,9mm
- Taper angle tolerance < AT 3 according to DIN 2080
- Surface roughness Ra < 0,4 µm
- Tensile strength in the core of min. 800 N/mm? after DIN
- All functional surfaces fine machined
Hydraulic expansion chuck SK 40 – 10 – 72
Application:
For mounting straight-shank tools acc. DIN 1835 form A+B+E and DIN 6535 form HA+HB+HE (larger than dia. 20 mm only with reduction sleeve).
Note:
l1 = max. clamping depth l2 = max. length adjustment range
Without wrench
- All holders are made of forged steel
- Specific, low warpage hardened
- Surface hardened HRC 58~60
- Hardening depth 0,8mm~0,9mm
- Taper angle tolerance < AT 3 according to DIN 2080
- Surface roughness Ra < 0,4 µm
- Tensile strength in the core of min. 800 N/mm? after DIN
- All functional surfaces fine machined
Hydraulic expansion chuck SK 40 – 12 – 77
Application:
For mounting straight-shank tools acc. DIN 1835 form A+B+E and DIN 6535 form HA+HB+HE (larger than dia. 20 mm only with reduction sleeve).
Note:
l1 = max. clamping depth l2 = max. length adjustment range
Without wrench
- All holders are made of forged steel
- Specific, low warpage hardened
- Surface hardened HRC 58~60
- Hardening depth 0,8mm~0,9mm
- Taper angle tolerance < AT 3 according to DIN 2080
- Surface roughness Ra < 0,4 µm
- Tensile strength in the core of min. 800 N/mm? after DIN
- All functional surfaces fine machined
Hydraulic expansion chuck SK 40 – 14 – 77
Application:
For mounting straight-shank tools acc. DIN 1835 form A+B+E and DIN 6535 form HA+HB+HE (larger than dia. 20 mm only with reduction sleeve).
Note:
l1 = max. clamping depth l2 = max. length adjustment range
Without wrench
- All holders are made of forged steel
- Specific, low warpage hardened
- Surface hardened HRC 58~60
- Hardening depth 0,8mm~0,9mm
- Taper angle tolerance < AT 3 according to DIN 2080
- Surface roughness Ra < 0,4 µm
- Tensile strength in the core of min. 800 N/mm? after DIN
- All functional surfaces fine machined
Hydraulic expansion chuck SK 40 – 16 – 80
Application:
For mounting straight-shank tools acc. DIN 1835 form A+B+E and DIN 6535 form HA+HB+HE (larger than dia. 20 mm only with reduction sleeve).
Note:
l1 = max. clamping depth l2 = max. length adjustment range
Without wrench
- All holders are made of forged steel
- Specific, low warpage hardened
- Surface hardened HRC 58~60
- Hardening depth 0,8mm~0,9mm
- Taper angle tolerance < AT 3 according to DIN 2080
- Surface roughness Ra < 0,4 µm
- Tensile strength in the core of min. 800 N/mm? after DIN
- All functional surfaces fine machined
Hydraulic expansion chuck SK 40 – 18 – 80
Application:
For mounting straight-shank tools acc. DIN 1835 form A+B+E and DIN 6535 form HA+HB+HE (larger than dia. 20 mm only with reduction sleeve).
Note:
l1 = max. clamping depth l2 = max. length adjustment range
Without wrench
- All holders are made of forged steel
- Specific, low warpage hardened
- Surface hardened HRC 58~60
- Hardening depth 0,8mm~0,9mm
- Taper angle tolerance < AT 3 according to DIN 2080
- Surface roughness Ra < 0,4 µm
- Tensile strength in the core of min. 800 N/mm? after DIN
- All functional surfaces fine machined
Hydraulic expansion chuck SK 40 – 20 – 82
Application:
For mounting straight-shank tools acc. DIN 1835 form A+B+E and DIN 6535 form HA+HB+HE (larger than dia. 20 mm only with reduction sleeve).
Note:
l1 = max. clamping depth l2 = max. length adjustment range
Without wrench
- All holders are made of forged steel
- Specific, low warpage hardened
- Surface hardened HRC 58~60
- Hardening depth 0,8mm~0,9mm
- Taper angle tolerance < AT 3 according to DIN 2080
- Surface roughness Ra < 0,4 µm
- Tensile strength in the core of min. 800 N/mm? after DIN
- All functional surfaces fine machined
Hydraulic expansion chuck SK 40 – 25 – 117
Application:
For mounting straight-shank tools acc. DIN 1835 form A+B+E and DIN 6535 form HA+HB+HE (larger than dia. 20 mm only with reduction sleeve).
Note:
l1 = max. clamping depth l2 = max. length adjustment range
Without wrench
- All holders are made of forged steel
- Specific, low warpage hardened
- Surface hardened HRC 58~60
- Hardening depth 0,8mm~0,9mm
- Taper angle tolerance < AT 3 according to DIN 2080
- Surface roughness Ra < 0,4 µm
- Tensile strength in the core of min. 800 N/mm? after DIN
- All functional surfaces fine machined
Hydraulic expansion chuck SK 40 – 32 – 117
Application:
For mounting straight-shank tools acc. DIN 1835 form A+B+E and DIN 6535 form HA+HB+HE (larger than dia. 20 mm only with reduction sleeve).
Note:
l1 = max. clamping depth l2 = max. length adjustment range
Without wrench
- All holders are made of forged steel
- Specific, low warpage hardened
- Surface hardened HRC 58~60
- Hardening depth 0,8mm~0,9mm
- Taper angle tolerance < AT 3 according to DIN 2080
- Surface roughness Ra < 0,4 µm
- Tensile strength in the core of min. 800 N/mm? after DIN
- All functional surfaces fine machined


